Getting started - Onboarding for marketers
At a glance: get everything set up to start measuring installs and in-app events with AdShift — sign up, register your first app, integrate the SDK, and connect ad partners.
The estimates below are guidance only — every app and team is different.
Account setup
The account admin completes this step.
| Step | Time | Comments |
|---|---|---|
| Sign up with AdShift | 5 min | At signup, choose App Owner or Agency. Pick App Owner if you measure your own apps. Pick Agency if you manage campaigns or accounts for multiple advertisers — agencies get a multi-tenant dashboard, client invitations, and consolidated billing across the client roster. The choice is not reversible. |
Result: your AdShift account is active.
The next three steps — Add your app, Integrate the SDK, and Connect to partners — make up the App onboarding wizard. The first time you open AdShift, the wizard takes over the dashboard and highlights one step at a time, walking you through them in order. You can leave the wizard at any point and resume it later from Account → App onboarding, or follow the same steps manually using this guide.

Step 1: Add your app
Complete for each app you want to measure.
| Step | Time | Comments |
|---|---|---|
| Choose platform | 1 min | iOS or Android. Fill in the related app data for the selected platform. |
| Set timezone and currency | 1 min | Currency cannot be changed after the app is created — pick carefully. All revenue and cost data is converted into this currency. |
| Set the app's store status and store identifier | 1 min | Android: package name or Google Play URL. iOS: App Store ID or App Store URL. Provide at least one. |
| Set attribution windows (re-attribution, inactivity) | 1 min | Defaults (90-day re-attribution, 0 inactivity) work for most apps. |
Result: your app is registered in AdShift and ready for SDK integration.
Step 2: Integrate the SDK
The SDK records app installs and in-app events (purchases, sign-ups, level completes, etc.).
Developer documentation
The full integration guide — install instructions, code samples, init parameters, event APIs, and platform-specific notes — lives at dev.adshift.com. Send that link to your developer along with the hand-off message in §2.3.
2.1 Register your test device
Used to verify the SDK integration end-to-end before going live.
| Step | Comments |
|---|---|
| Enter a device name | A label to recognize the device (required, max 50 characters), e.g. "My Test Phone". |
| Select operating system | Android, iOS, or Windows. |
| Select the device ID type | Android: AID (Google Advertising ID) or OAID. iOS: IDFA or IDFV. Windows: WIN_ADID. |
| Enter the device ID | The actual identifier value for the selected type (UUID format). |
2.2 Select in-app events
In-app events let you measure post-install actions (e.g. purchases, sign-ups) in your campaigns and reports. We recommend using the in-app event generator: through the GUI you can pick the events you need, parameterize them, and get a ready-made file to copy straight into your app's code — which makes the SDK integration faster and less error-prone.
- Open the In-app event generator.
- Pick your vertical (gaming, social, healthcare, etc.).
- Pick recommended events and parameters — add custom ones as needed.
- Download the generated snippet in your developer's language (Kotlin, Swift, TypeScript, Dart, C#) or as JSON.
- Send the file to your developer — they paste the event names and parameters directly into the SDK initialization.
2.3 Hand off to your developer
Open Prepare for SDK integration and copy the prefilled message. It contains:
- App ID / package name — identifies your app in AdShift.
- Dev Key — initializes the SDK. Safe to share with developers.
What these fields are and where to find them
Both values are filled in automatically for the app you currently have selected, so in most cases you don't need to look them up manually. If you want to check or copy them on their own, here's where they live in the dashboard:
-
App ID / package name — the unique identifier of your application. You set it when adding the app, and it's used across AdShift to attribute installs and in-app events to the right app. Where to find it: Settings → My Apps, where every app is listed by its App ID / package name. It's also shown in the app selector at the top of most settings pages.
-
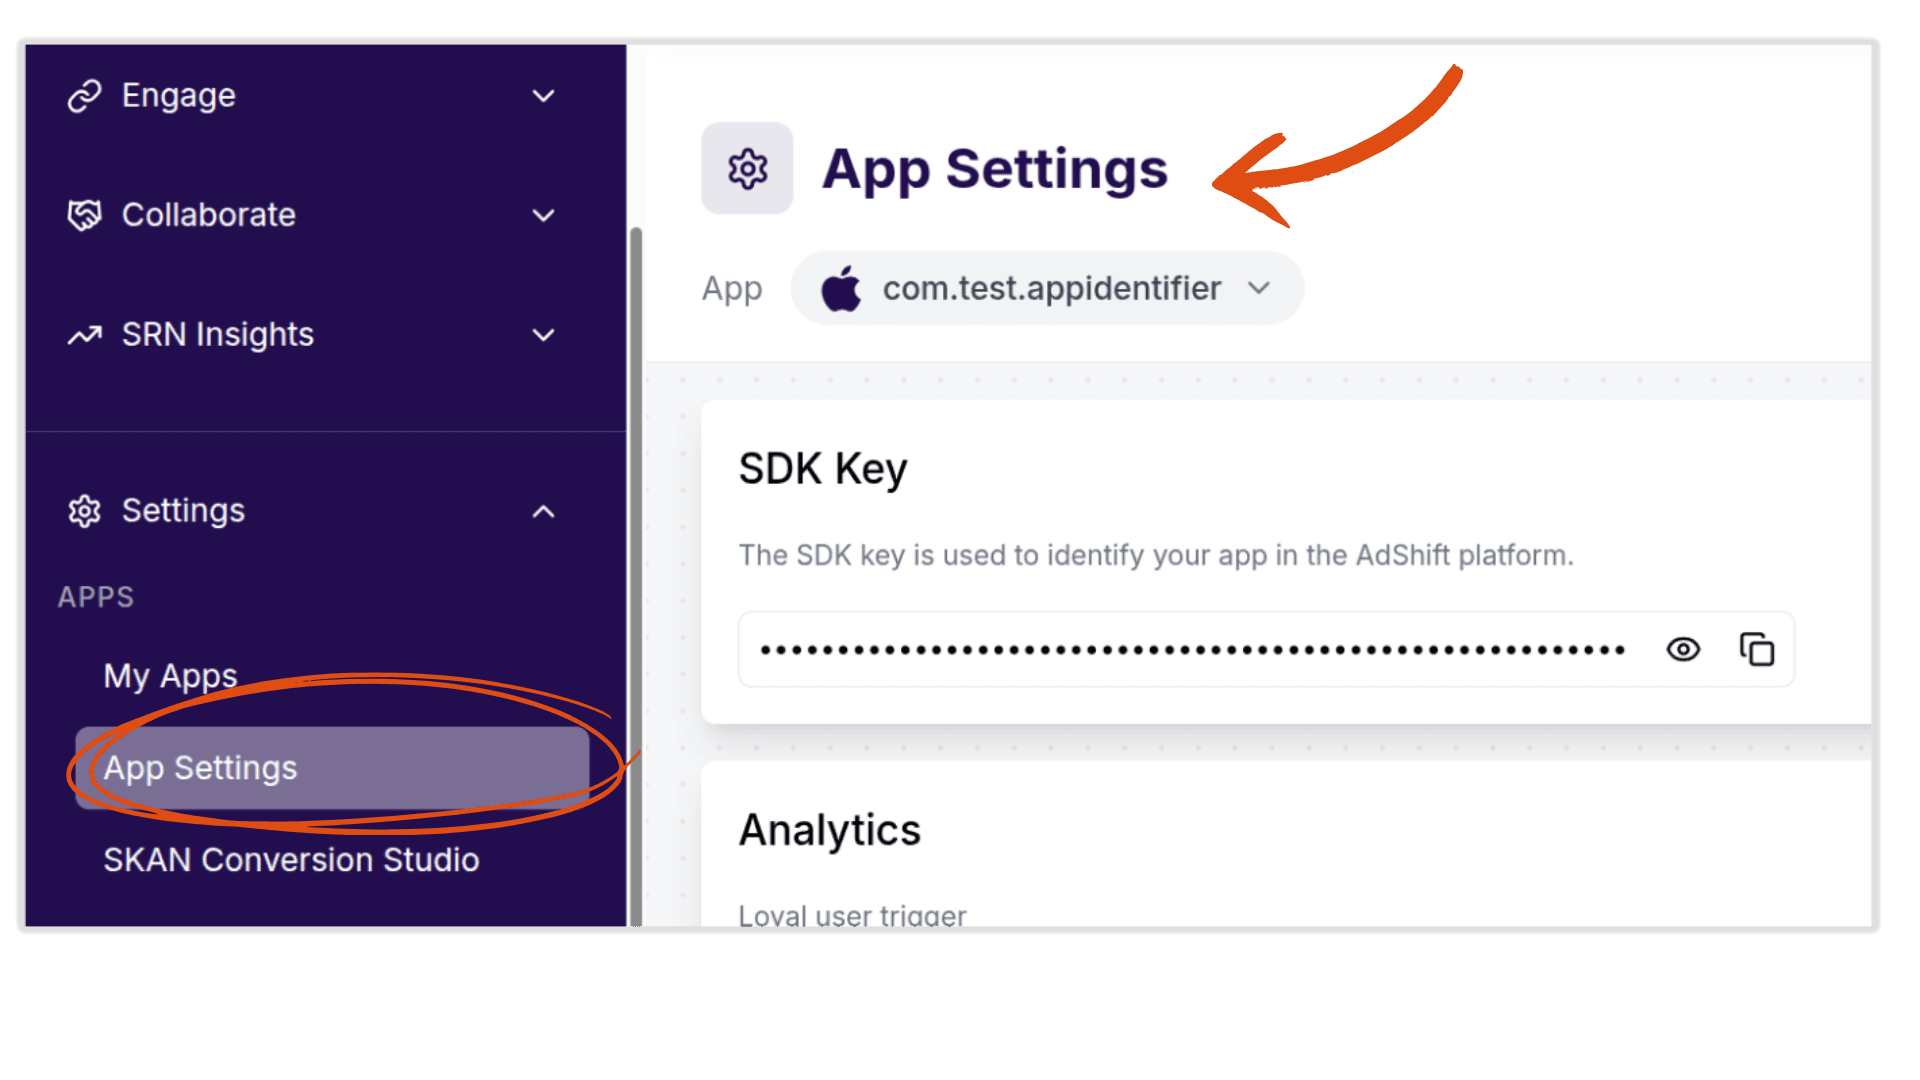
Dev Key — the key that initializes the AdShift SDK in your app. It tells the SDK which AdShift account and app the data belongs to. It's meant to be embedded in the app, so it's safe to share with your developers. Where to find it: Settings → App Settings, in the SDK Key field. Use the eye icon to reveal it and the copy icon to copy it to the clipboard.
Tip: Make sure the correct app is selected before copying the message — the App ID and Dev Key always refer to the currently selected app.
| Step | Owner | Time |
|---|---|---|
| Pick events and SDK options | Product manager | 1 hour |
| Send dev hand-off message | Product manager | 5 min |
| Implement the SDK | Developer | 2–3 hours |
| Verify with the test device | Product manager / Developer | 30 min |
| Release new app version | Product manager | 1 hour |
Result: your app reports installs and in-app events to AdShift.
Step 3: Connect to partners
Connect to ad networks, SRN partners, and tech partners to acquire users, measure campaign performance, and forward in-app data. AdShift guides you through this step with a built-in tour — open a partner, review its profile, configure the integration, and (for ad networks) create an attribution link for your campaigns.

- Open Collaborate → Partners and browse the catalog of available partners.
- Click a partner card to open its profile. Review the About, Supported features, Overview, and Partner info sections (main capabilities, pricing models, supported platforms, contact details) and decide if the partner matches your goals.
- (Optional) On the partner profile, click Contact partner to have AdShift send an introductory email on your behalf. Review what will be shared, then click Send quick introduction. No account data is shared — only the contact details needed to start a conversation.
- Click Configure integration to enter the integration view.
- For SRN partners (e.g. Meta, Google, Apple): this button stays disabled until you first connect your ad-network account (via OAuth) in the connection card on the partner page.
- At the top of the integration view, use the app selector to choose the app you want to integrate. The view has two tabs: Integration (partner setup) and Attribution link (campaign links). You start on the Integration tab.
- In the Integration tab, fill in the partner settings (see below), turn on the Activate partner toggle, and click Save integration. Activating the partner enables attribution and starts sending postbacks — and unlocks the Attribution link tab (it stays grayed out until then).
- Finish the setup based on the partner type:
- Ad networks (attribution-link partners): switch to the now-unlocked Attribution link tab to create a link for your campaigns (see the options below). AdShift generates the link as you configure it — copy it, hand it to the partner, and click Save attribution link.
- SRN partners (e.g. Meta, Google, Apple): the Attribution link tab is present but shows "This partner does not use external attribution links." Activating the integration is enough — attribution and event forwarding run through the connected ad-network account.
- Tech partners (e.g. RevenueCat): there's no Attribution link tab at all. Instead, you configure the webhook setup in the Integration tab so the partner can forward subscription and purchase events to AdShift.
Partner integration settings
The configuration block appears once you turn on Activate partner, and is set per selected app. Defaults are safe — change a value only when the partner asks you to. Specific fields can vary slightly by partner (for example, TikTok adds a TikTok App ID field, and SRN/Meta partners use OAuth instead of some of these fields).
General settings
| Field | What it does |
|---|---|
| Region | Free-text field for the partner's data region/endpoint that postbacks are sent to (placeholder us-east-1). Fill it in only if the partner requires a specific region. |
Install attribution
| Field | What it does |
|---|---|
| Install click-through lookback window | How far back AdShift looks for a click when attributing a new install. Set the value and the unit — Hours (1–24) or Days (1–30). |
| Install view-through lookback window | Same logic, but for ad impressions (views). Hours (1–24) or Days (1–30). |
| Install view-through attribution (toggle) | Enable only if the partner runs view-through (impression-based) campaigns. |
Re-engagement attribution
The same fields, applied to returning users (re-engagement): re-engagement click-through lookback window, re-engagement engaged view-through lookback window, and a Re-engagement view-through attribution toggle. Enable view-through only if the partner uses it.
Default postbacks
For each event type (Install, Re-engagement) choose who triggers a postback to this partner:
| Option | When AdShift posts back |
|---|---|
| This partner only (default) | Only when this partner won the attribution. |
| All media sources, including organic | On every install/re-engagement regardless of source. Use only when the partner explicitly needs full traffic visibility for optimization. |
If Install is set to This partner only, the Re-engagement option is locked to This partner only as well.
In-app event settings
Forward post-install events (e.g. purchase, sign-up) to the partner.
| Field | What it does |
|---|---|
| Region | Region/endpoint the in-app event postbacks are sent to (placeholder us-east-1). |
| Include in-app event postbacks (toggle) | Master switch — turn on to start sending in-app events. |
| In-app event postback window | How long after install an in-app event still triggers a postback — Hours (1–24), Days (1–30), Months (1–12), or Lifetime. |
| Event mapping | For each row, pick the AdShift event (as_uninstall or as_open), type the partner's event name, choose the sender scope (Partner only / All media sources, including organic), and the payload to include: No values & no revenue, No values & revenue, or Values & revenue. |
Attribution link options
When you build an attribution link (ad-network partners), you configure the following:
-
Attribution link type
- Single-platform link — one link pointing to a single store/platform.
- RightLink — a smart redirect that sends users to the right destination (App Store, Google Play, website, or directly into the app), which helps increase conversion. Choosing RightLink locks the manual parameter/window fields, since the routing is handled for you.
-
Attribution link parameters — key–value parameters appended to the link (e.g. campaign name, site ID). They carry campaign metadata into your reports. The first parameters are locked defaults; you can add your own below them.
-
Retargeting settings (toggle) — turn this on only for campaigns that re-engage existing users instead of acquiring new ones. Enabling it reveals the re-engagement options below.
- Ignore active users for retargeting (toggle) — when on, AdShift won't attribute re-engagement for users who are still active. A user counts as eligible only after being inactive for the Inactivity window (days) you set (1–30 days).
- Re-engagement window — how long after a click an app open still counts as a re-engagement/re-attribution. Choose the unit — Hours (1–24), Days (1–90), or Lifetime.
-
Click-through attribution → Click-through lookback window — the maximum time allowed between a user clicking the ad and installing for that click to get the credit. Unit: Hours (1–24) or Days (1–30).
-
View-through attribution → View-through lookback window (days) — the maximum time allowed between a user seeing the ad (an impression, with no click) and installing for that impression to get the credit. Range: 1–24 days.
As you adjust these settings, AdShift regenerates the click and view-through attribution links in real time. Copy each link and provide it to the partner to use in their campaigns, then click Save attribution link.
Result: the partner receives attribution and event postbacks from AdShift. Where supported, you can also generate attribution links and pull cost data from this partner.
Step 4: Invite your team
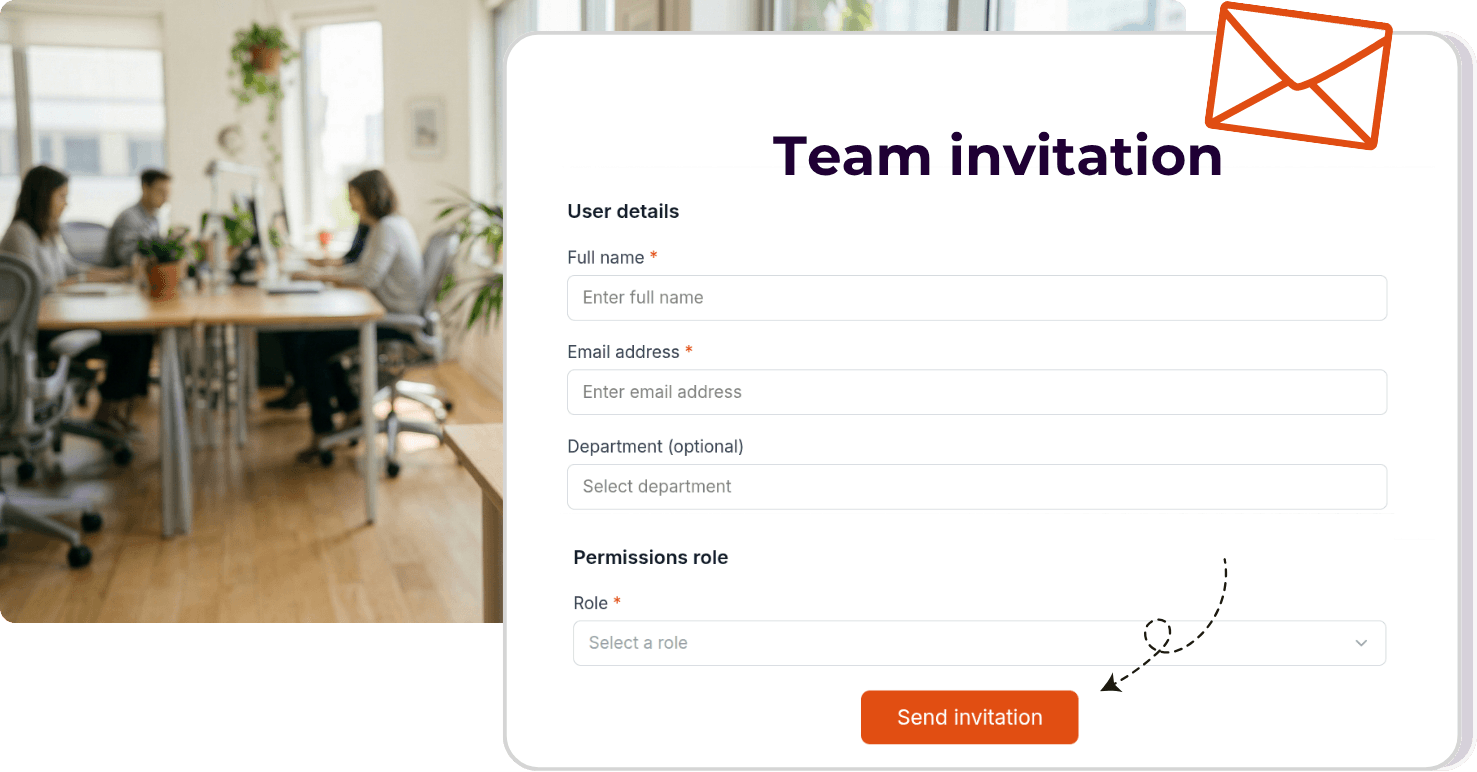
You can invite team members to collaborate on your project without sharing your account credentials. Go to your profile menu (top-right corner) → User management → New user.
Each invitation requires a full name, email address, and a permissions role. The invited user receives an email with a link to join the project. Use this to give your developers, media buyers, or analysts access to exactly the parts of AdShift they need — without broader account-level permissions.
Permission roles
AdShift uses five built-in roles. Pick the one that matches what the person actually needs to do — you can always change it later.
| Role | Best for | What they can do |
|---|---|---|
| Project Owner | The person responsible for the project end-to-end | Full access: manage apps, partners, SKAN, templates, RightLinks, creatives, test devices, billing, analytics, fraud protection, and team members. Identical permissions to Project Admin; additionally marked as the project's owner. |
| Project Admin | A trusted team lead or account manager | Same full access as Project Owner. Use this when you want someone to have full control without the semantic "owner" designation. |
| App Editor | Developer or growth manager | Can manage apps, partner integrations, SKAN configurations, RightLinks, and creatives. Read-only access to integrations and SRN insights. Cannot manage billing, templates, test devices, fraud protection, or team members. |
| Template Editor | Someone who builds or maintains RightLink templates and creative assets | Can manage templates, RightLinks, and creatives. No access to apps, partners, SKAN, billing, analytics, or team members. |
| Viewer | Media buyer, analyst, or any stakeholder who needs to see data without making changes | Read-only access to all sections: apps, partners, SKAN, templates, RightLinks, creatives, billing, test devices, integrations, analytics, and SRN insights. Cannot create, edit, or delete anything. |
Custom roles — if none of the built-in roles fits, you can create a custom role and hand-pick individual permissions from the available set (apps, partners, SKAN, templates, RightLinks, creatives, billing, test devices, integrations, analytics, fraud protection, and team members). Custom roles are scoped to your project and can be updated at any time.
What's next
Once the basics are running, explore these additional capabilities.
Set up RightLinks (attribution links)
RightLinks are AdShift's attribution links — single URLs that:
- Open your app on iOS via Universal Links and on Android via App Links when the app is installed (no app-store detour).
- Fall back to the app store (or a custom web URL) when the app isn't installed.
- Redirect to your website when clicked on desktop.
- Record the click so AdShift can attribute the resulting install or re-engagement to the right media source and campaign.
Use RightLinks anywhere you need a trackable, deep-linking URL: paid social campaigns, SMS, QR codes, referral programmes, cross-app promotions, or any other channel where you want installs and re-engagements tied to a specific media source.
RightLinks follow a three-level model: Project → Template → Link. Every link is created from a template, and every template belongs to a project. Before you can create your first RightLink, you need at least one template.
Create a RightLinks template
Both values are filled in automatically for the app you currently have selected, so in most cases you don't need to look them up manually. If you want to check or copy them on their own, here's where they live in the dashboard:
To create a template, go to RightLinks → New template and fill in the following:
| Setting | Notes |
|---|---|
| Template name | Internal label — not visible in the generated link URL. |
| Apps | Select the iOS app, the Android app, or both. The available apps come from the ones already registered in this project. A template can cover a single platform or both at once. |
| Subdomain | Becomes part of every link URL: https://{subdomain}.rightlink.me/…. The subdomain cannot be changed once any link has been generated from the template — choose it carefully. The subdomain is globally unique across all AdShift projects. |
Redirection
Redirection settings define what happens when a user follows a link but the expected condition is not met. These settings apply to all links built from the template and should be agreed between the marketer and developer before the template is created.
iOS
| Setting | Notes |
|---|---|
| When app isn't installed | Where to send the user — typically the App Store listing. Requires an iOS app to be selected for the template before this can be configured. |
Android
| Setting | Notes |
|---|---|
| When app isn't installed | Where to send the user — typically the Google Play listing. |
| When app is installed | By default, users with the app installed are handled identically to users without it unless App Links are configured. To enable App Links (so the app opens directly), you must first define the subdomain above. |
Desktop
| Setting | Notes |
|---|---|
| When link is clicked on desktop | Where to send the user when the link is opened in a desktop browser — typically your marketing website or a campaign landing page. |
Create a RightLink
RightLinks let you create and manage click links (built on a OneLink template) for a specific user journey.
- Go to Engage → RightLink Management and pick a OneLink template from the template dropdown at the top. (Use the three-dot menu to Add, Edit, or Delete a template.)
- In the Created Links panel, click New link. In the New link dialog:
-
Select experience — this shapes the intended user journey:
Experience Use case Social-to-app Send users to your app from social media posts or ads. Referral-to-app Let existing users refer others to your app. Text-to-app Send users to your app via SMS or messaging apps. QR-to-app Send users to your app from a QR code. App-to-app Send users to your app from inside another app. Custom experience Any other scenario not covered above. -
Select media source name — determines which media source the click is recorded under in AdShift and is passed as the
pidparameter in the link URL. Pick a predefined source for the chosen experience (e.g.Social_instagram,SMS,QR_code,User_invite) or choose Custom media source name to type your own. -
Click Next to open the 4-step link builder.
-
Steps 1–4: link builder
You can open the Link preview panel at any point in the builder to see the parameters, capabilities, redirection, and landing-page thumbnail that your settings produce.
Step 1 — General settings
Attribution
- Media source name (required) — prefilled from your modal choice; switch to Custom media source to enter a custom value.
- Campaign name (required) — passed as the
cparameter. AdShift checks availability in real time; the same media-source + campaign combination can't be reused on another link.
Retargeting — turn this on only if the link re-engages existing/past users (note: re-engagement must also be enabled in App Settings).
- Ignore active users for retargeting (toggle) — don't re-attribute users who are still active. When on, set the Inactivity window (days) (1–30): a user qualifies only after being inactive that long.
- Re-engagement window — how long after a click an app open still counts as a re-engagement. Unit: Hours (1–24), Days (1–90), or Lifetime.
Step 2 — Experience settings
Here you set up how the link looks when shared and, optionally, its landing page.
Social media preview — controls the preview shown when the link is shared:
- Use OG tags from desktop web URL or store — reuse existing Open Graph tags (default).
- Create your own preview image and tags — set a custom Title, Description, and Image URL, with a live preview.
Social app landing page — click Create social app landing page to open the Creative editor and build a hosted landing page that users see before being redirected to your app or the store.
A landing page is a branded, controllable step between the click and the app — instead of dropping users straight into a redirect, it gives you a moment to reinforce the campaign message and set expectations. It also solves a real technical problem: social apps like Instagram, Facebook, Pinterest, X, Snapchat, LinkedIn, and WeChat often strip Universal Links and App Links inside their built-in browsers. A creative restores the "open the app" behaviour that would otherwise fall back to a failed redirect or the store.
Creatives are built and edited entirely in the Creative editor, so your marketing team can iterate on the landing experience without involving a developer or shipping a new app version. The page is hosted for you at no runtime cost and can be reused across multiple links.
Step 3 — Deep linking & redirection
Deep linking (requires developer setup in the app + OneLink template):
- Deep link value — passed as
deep_link_value(e.g.my_discount_page). - Additional deep link value — passed as
deep_link_sub1.
Redirection — inherits the template's redirect setup; you can override per platform:
- iOS — when the app isn't installed, redirect to App Store or a Web URL.
- Android — when the app isn't installed, redirect to Google Play or a Web URL.
- Desktop — redirect desktop clicks to the App Store page or a Web URL.
(When the app is installed, the link launches it via Universal Links / Android App Links if the template is configured for it.)
Step 4 — Additional parameters
- Attribution parameters — add custom key–value parameters to the link for more granular reporting.
- Customize lookback window (toggle) — override the click lookback window; unit Hours (1–24) or Days (1–90). Passed as
as_click_lookback. - Enable cost per install (toggle) — record campaign cost: pick a currency and enter the cost value. Passed as
as_cost_value/as_cost_currency.
Click Create link on the last step. The link appears in Created Links; use the row menu to Get URL (copy the link from the Link URLs dialog), Edit, Preview its landing page, or Delete it.